Bread Soup


 photo SAM_0434_zps34caaccf.jpg
(My Easy Bread)

One of the consequences of there only being two of us in this house and eating most of the time is the fact that we have a difficult time using up a loaf of bread before it goes stale.   I really like good bread and a good loaf of bread can be somewhat expensive, so I don't like for any of it to go to waste.  It only makes sense to have a few things up your sleeves that you can do with it . . . like bread pudding and such.   I hate waste, don't you?

 photo supper-for-a-songMAIN_zpsdad6f2d4.jpg

This is a cookery book I have had for a while, by Tamasin Day-Lewis. It's a jewel.  It's filled with lots of lovely recipes for dishes that are not only economical but also delicious.  Recipes such as this Bread Soup, which she admits to originally pinching from Anna Del Conte.

 photo SAM_3022_zpsffc48b1b.jpg

I love cooking and the beautiful chemistry that happens when you throw ingredients together.  Sometimes it is so amazing.  Who would ever think that with a few ingredients such as olive oil, stale bread, chicken stock, garlic, parsley, chilli flakes and some seasoning you could end up with a delicious soup???

  photo SAM_3023_zps106a7a33.jpg

And that is exactly what this is . . . a magically delicious soup!  Made from simple ingredients, put together in a simple manner.  Of course it stands to reason that if you are only going to be using a few ingredients, you will want them to be the best you have.  Use a good sturdy loaf of bread, a crusty country loaf, several days old.

 photo SAM_3027_zpsf607908e.jpg

A good chicken stock, well flavoured.  Homemade is good, but if you don't have that, a good quality store bought one works well also.

 photo SAM_3026_zpsb1445574.jpg

The best extra virgin olive oil your money can buy.  It matters.

 photo SAM_3032_zps6b40b39f.jpg

Fresh parsley and  fresh garlic.    Sea salt, freshly ground black pepper.   A good cheese for grating.

 photo SAM_3034_zps081ae46f.jpg

Something very magical happens.   Trust me on this.  It's absolutely gorgeous!  A new favourite!  Simple.  Easy.  Delicious and Quick!

 photo SAM_3025_zps803fa71e.jpg


*Bread Soup*
Serves 4 
Printable Recipe

The most delicious soup from nothing but stock, bread crumbs and a bit of garlic, parsley and seasoning.  Oh, I do love recipes such as this which help to celebrate simple ingredients and methods in a most delicious way.  I believe in Italy this is called Pancotto. You will want to use a good quality rustic styled bread loaf for this, preferably a couple of days old. 

4 thick slices of stale country style bread, good quality, crusts removed
5 TBS EXTRA virgin olive oil (not the cheap every day use one)
1/2 tsp dried crushed chilies
3 dloves of garlic, peeled and crushed
a small handful of finely chopped fresh flat leaf parsley, about 2 TBS
1 1/2 litres of hot chicken stock (a scant 6 1/2 cups)
fine sea salt and freshly ground black pepper to taste 
freshly grated Pecorino cheese to serve

Crumble your bread into  bits and then blitz them in a food processor for a couple of seconds, until you get a coarse crumb.  Heat the olive oil, dried chilies, garlic and parsley in a heavy bottomed saucepan.  Saute for about 30 seconds until you can smell the garlic.  Tip in the bread and cook, stirring frequently, for 3 to 4 minutes, until the bread begins to turn golden brown.  Add the hot stock.   Cover and simmer for half an hour. 

Taste the soup and adjust seasonings as necessary.   Serve ladled out into hot soup bowls with lashings of grated Pecorino cheese on top.

Mac and Cheese on a Monday afternoon


One of my absolute favourite dishes of all time has been macaroni and cheese. This is the ultimate in comfort food to me.

I have tried many, many different recipes. I love it done the old fashioned way which is pure and unadulterated, nothing but cooked macaroni, milk, chunks of cheese and lots of butter. Seasoned with salt and pepper and baked until the milk is almost absorbed by the macaroni and there are gooey patches of delicious cheese scattered throughout . . . it is simple, old fashioned, and really, really good.


I love the boxed ones. I know a sacrilege to some, but lets face it, they can be quite comforting as well and make a great lunch in a pinch. I have a distinct preference for Presidents Choice White Cheddar Macaroni and Cheese mix, which I can only get in Canada and I can't wait until next year when I can go over and stock up on the stuff.

I love to add a tin of chopped tomatoes when I am making the boxed stuff, or some Heinz chili sauce. This takes it beyond the ordinary and turns it into something special. I could eat the whole box all by myself, and when I was younger, my husband and I often ate a box of it for an evening snack before we went to bed. (ahh youth . . . )


When I really want to indulge though, this is the version I make. There is no better way to make a good macaroni and cheese, and I have tried quite a few different versions. This is the culimation of years of testing and trying and this is what I have come to think is the ultimate in Macaroni and Cheese. A rich and cheesy sauce, and lots of it in comparison to the macaroni, and topped with buttery crisp bread crumbs.


You need look no further. This IS the absolute best.


*Ultimate Macaroni and Cheese*
Serves 4
Printable Recipe

This, to me, is the absolute best macaroni and cheese recipe ever. Rich, yes. Lucious, yes. Cheesy, yes. Fattening, who cares . . . The best, ultimately.

225g dry macaroni (2 cups)
56g ounces butter (1/4 cup)
56g plain flour (1/3 cup)
1/2 pint milk (1 cup)
1/2 pint double cream (1 cup)
1/2 tsp salt
freshly ground black pepper to taste
120g strong cheddar, shredded (1 cup)
55g Red Leicester cheese, shredded (1/2 cup)
55g Parmesan Reggiano cheese, shredded (1/3 cup)
65g fresh bread crumbs or cracker crumbs (1 cup)
2 TBS melted butter


Pre-heat the oven to 200*C/400*F. Butter a casserole dish and set aside.

Melt the butter in a saucepan. Whisk in the flour and cook, stirring for one minute. Slowly whisk in the milk and the cream, whisking constantly. Add the salt and pepper. Cook, whisking constantly, until the mixture bubbles and thickens. Stir in the cheeses, mixing in until they are melted. Set aside.

Cook the macaroni in lightly salted boiling water to cover until done, according to the package directions. Drain well. Stir the drained macaroni into the cheese sauce. Pour the complete mixture into the prepared casserole dish.

Mix the melted butter with the bread crumbs. Sprinkle evenly over top of the macaroni. Bake for 30 to 35 minutes, until golden brown and bubbly. Let sit a few minutes before serving.

Ohh, I do so love a little Cake . . .


I have a confession to make.

I am one of those obnoxious people that walk around the grocery shops, tut tutting and taking note of things that look delicious, all the while telling myself that I could quite easily make them at home . . . not only cheaper but somehow tastier too.


I know, it's annoying isn't it! But I have to say that 99% of the time it works for me. I just basically take note of the ingredients on the package, leaving out any artificial flavours and chemicals of course . . . and then I come home and try to replicate it as best as I can.


Now I know I'm not the only one who does this . . . am I? Come on fess up!!!

This is one of my recent successes. I saw these tasty looking little cakelettes in Tesco one day . . . one of their finest desserts line . . . and I thought to myself . . . scrummy, but I don't want to pay what they're asking and so . . .


I came home and made it myself. It wasn't all that hard.

Scrummy Hazelnut frangipane cake batter, dropped on top of a sweet pear half, dropped on top of some toasted chopped hazelnuts, which in turn have been placed on top of a mixture of melted butter and brown sugar.


Easy peasy, lemon squeasy and oh-so-tasty too! A quenelle of clotted cream is a must on top of them, served warm, so that it melts down over the cake. Every mouthful was a delight!


*Pear and Hazelnut Frangipane Cakelettes*
Serves 6
Printable Recipe

I saw something similar to this in the grocery store the other day and thought to myself, I can do better than that! Serve warm with a dollop of clotted cream for a real taste treat!

1 tin of small pear halves, well drained
(You will need six halves)
6 TBS butter
12 TBS soft light brown sugar, packed
2 ounces of toasted hazlenuts, chopped

For the frangipane:
165g of ground toasted hazlenuts (1 cup)
125g of caster sugar (1/2 cup)
6 TBS of butter
1/4 tsp of vanilla
2 large free range eggs
20g of plain flour (1/4 cup)

You will need 6 (8 ounce) porcelain ramekins. Butter each well and then place them on a baking tray. Preheat the oven to 180*C/350*F/ gas mark 4.

Melt the butter and pour an equal amount into the bottom of each ramekin. Sprinkle 2 TBS of the brown sugar into each. Top with an equal amount of toasted chopped hazlenuts.

Make the frangipane. Beat together the butter and sugar until fluffy. Beat in the eggs and vanilla. Whisk together the flour and ground nuts. Fold this into the creamed mixture, making sure it is evenly combined.

Place one pear half on top of the hazelnuts in each ramekin. Top each with 1/6 of the frangipane. Bake in the preheated oven for 30 to 40 minutes, until set and nicely browned. Let stand for several minutes. Run a sharp knife around the edge of each and then carefully invert onto serving plates. Allow to cool for about 10 minutes, then top with a dollop of clotted cream (If desired) or vanilla ice cream and serve.

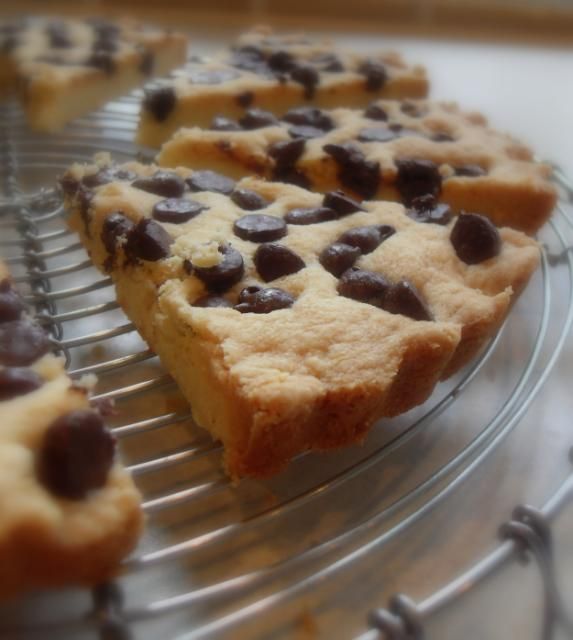
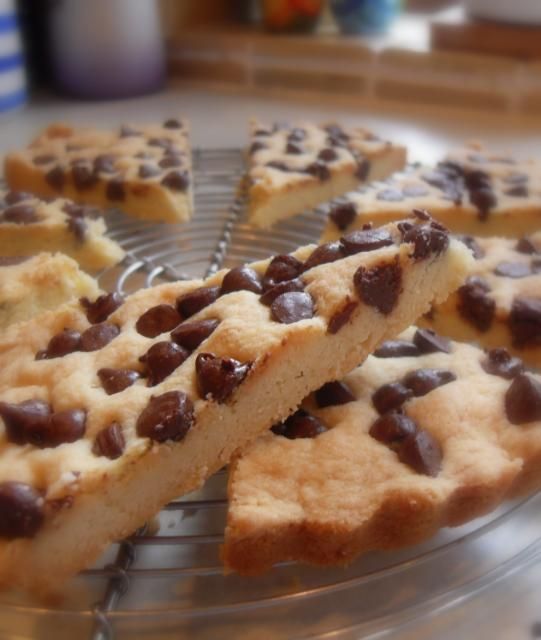
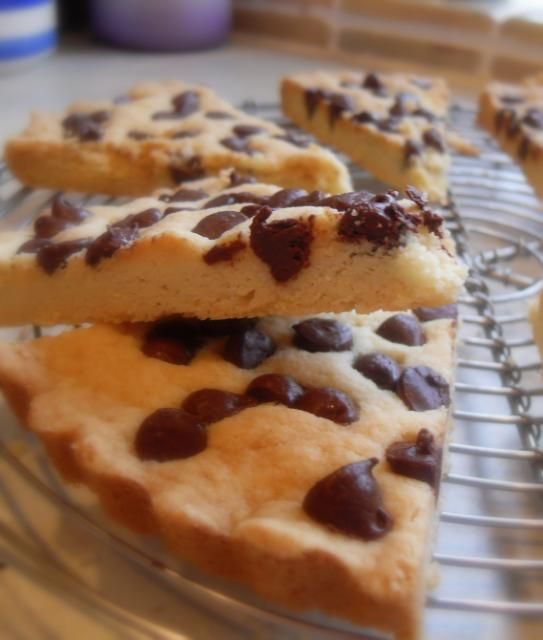
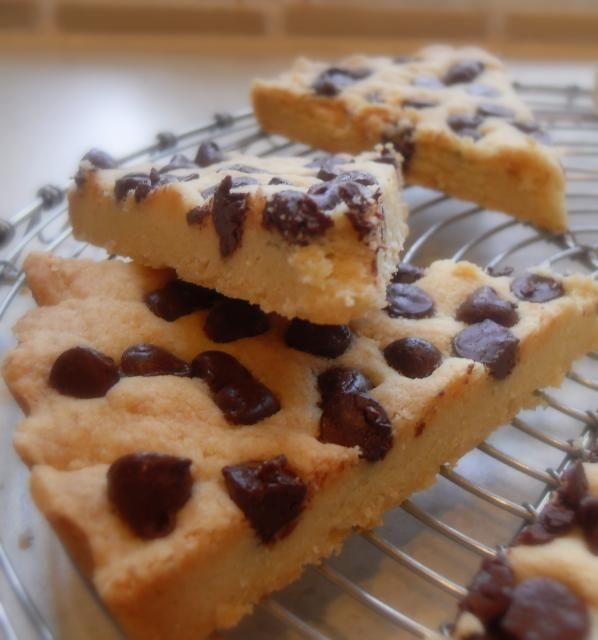
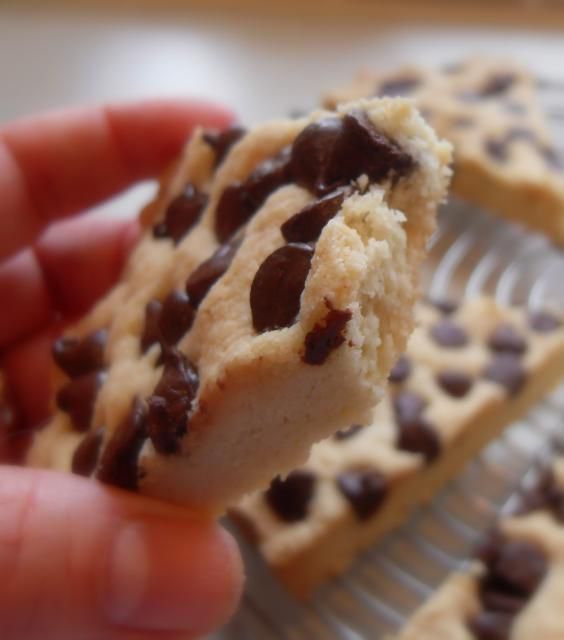
Chocolate Chip Shortbread


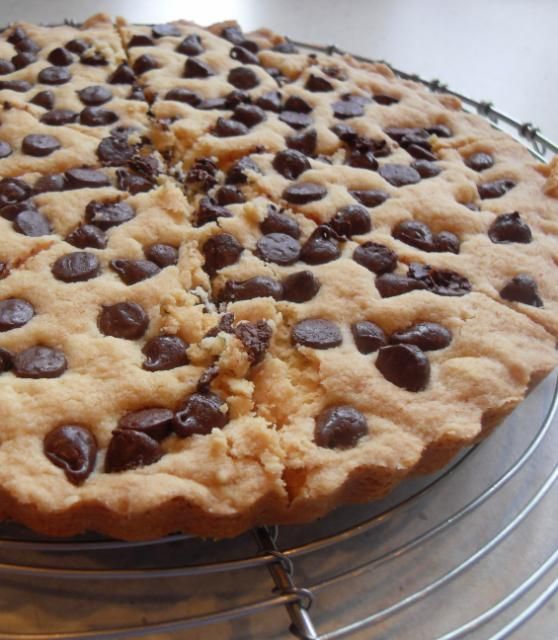
Shortbread is one of those most delicious of things that it can easily become quite addictive . . . buttery and short textured, with just the right amount of sweetness so as not to be cloying, it quite readily accepts additional flavours . . . without them clashing . . .


Tasty things like candied ginger . . . glace cherries . . . toasted nuts . . . chocolate chips . . . . ahhh . . .


Chocolate Chips!!!


Most certainly inspired, these are absolutely fabulous. I am wondering now why I didn't think to add some toasted pecans and then mini marshmallows . . . I guess it would have been Rocky Road Shortbread then . . .


And even more addictively scrummy . . .


but never mind . . . there's always the next time. ☺

You may want to keep these under lock and key . . . if they last even that long. They'll be so incredibly popular that they are bound to disappear in the blink of an eye!


What a shame . . . you'll just have to make them again, I guess . . .

and again . . . and again . . . and . . . again!


Some hints for making moreishly addictive shortbreads: Use ONLY butter, there are no substitutes. Do NOT overbake. The biscuits should be a pale golden colour, NOT golden brown. Work quickly and do NOT overwork the dough. The heat from your hands can easily turn it oily. Use ONLY your fingertips and just work the dough until it begins to come together. Use a LIGHT hand when patting it into the pan also. They can also be rolled out and cut like sugar cookies, but again, try only to re-roll them as little as possible.

Go on . . . take a bite. You know you want to!!


*Chocolate Chip Shortbread*
Serves 8
Printable Recipe

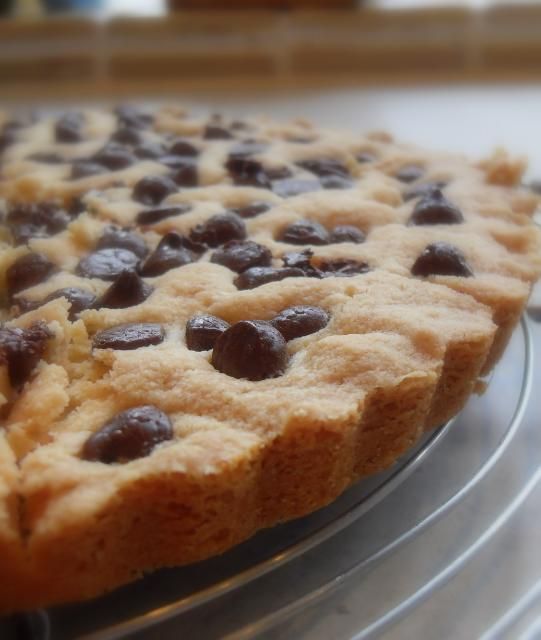
A delicious buttery shortbread biscuit, topped with lovely semi sweet chocolate chips. Mmmm . . . the perfect thing to go with your afternoon cuppa!

140g plain flour (1 cup)
60g cornflour (1/3 cup)
56g golden caster sugar (5 TBS)
4 ounces cold butter, diced (1/2 cup)
(plus extra for buttering the pan)
2 ounces semi sweet chocolate chips
Preheat the oven to 160*C/325*F. Butter a 9 inch loose bottomed tart tin. Set aside.

Sift the flour and cornflour into a bowl. Whisk in the sugar. Drop in the butter and rub it in with your fingertips until the mixture starts to bind together. Turn into the prepared pan and press evenly over the base with your fingertips, smoothing it out as evenly as possible. Prick all over with a fork. Sprinkle the chocolate chips over the surface and then press them lightly into the dough.

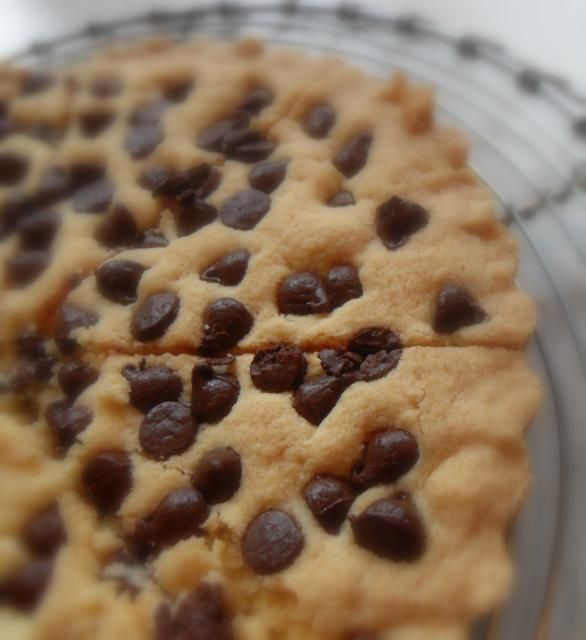
Bake in the heated oven for 25 to 40 minutes, or until cooked, but not browned. Immediately mark into 8 portions with a sharp knife. Allow to cool in the tin for 10 minutes, then transfer to a wire rack to cool completely.

Knorr Gravy Pots, Award Winners!


I got a fabulous hamper  in the post the other day. I love it when that happens.  Nestled inside was .this!!
 photo SAM_2927_zps005e73f1.jpg

Everything that anyone could possibly need to cook a delicious Roast Beef Dinner, with fresh carrots, potatoes, parsnips, broccoli, a joint of beef, a lovely porcelain gravy boat and these gravy pots from Knorr!

 photo SAM_2928_zps1ff654cd.jpg

I have long been familiar with the Knorr stock pots and use them frequently, but I have not had a lot of experience with the gravy pots.  I was interested to learn that Knorr Gravy Pots have wond the Gravy/Stock category in the product of the year awards for 2014!  Exciting news for Knorr!

Launched in 2012, and now available in three flavours . . .  Beef, Chicken and Onion . . . these gravy pots provide a quick and easy accompaniement to any roast dinner.

  photo stage_zps2d7f0a66.jpg

Igor Zago:  (Knorr Professional Chef and mastermind behind Gravy Pots)

"Myself and the team that created this fantastic product are extremely proud of winning this award.  I love the Gravy Pots because they provide an authentic consistent result every time."

I am no stranger to the powdered gravy mixes that are out there.  I have used them from time to time. Their results however can often be mixed, and you end up with either lumps, or little specks of undissolved gravy mix throughout the gravy. I often have to seive it so that it is smooth.  My mother never used gravy mixes.  She always made her own from scratch using the meat juices, and flour and water.  Her gavy was always pretty good and that's basically how I have always done it myself, unless I am in a rush.

 photo SAM_2990_zps07ed469f.jpg

Today however, I used the Knorr Pots, well the beef ones anyways and I was pleasantly surprised.   It was dark in colour, compared to my homemade stuff, which I rather liked and the flavour was really nice without being overly salty.  I like that.  I did add some of the juices from cooking my roast to the pot with the gravy pot.  The instructions were easy to follow and the end result was quite tasty.    I give them 10 out of 10 and am not surprised in the least that they have won an award.  I think they should be very proud of this indeed.   Innovative, easy to use, good flavours and perfect results.  You can't ask for more than that.

  photo SAM_2995_zps4c944302.jpg

I used my method for cooking the perfect roast beef, which you will find here.  It always ends up with the perfect roast beef.  Seriously.  Trust me on this.

Many thanks to Knorr and the Unilever kitchen people for sending me these to try out.  Although I was sent this lovely hamper for free, any and all opinions are my own.

Knorr Gravy Pots are readily available in most Grocery shops here in the UK, at a very reasonable price.

Irish Supper

  photo SAM_2979_zps3d9e513e.jpg

I don't know about you, but I find that it's getting harder and harder to stretch my food budget these days.  Food just seems to be costing more and more and sizes are getting smaller.  (Don't get me started on that scam!!) I am always looking for ways to make a little bit go further, but at the same time keeping things to the same standard of deliciousness and nutritiousness that we are used to.

  photo SAM_2970_zps1a94894f.jpg

Pasta is a great meal stretcher.  I know it's not Todd's favourite thing to eat, but he does like the idea of saving money, and so he tolerates it.  Myself . . . I adore pasta, and so these types of meals are my absolute favourites!

 photo SAM_2975_zpscb176821.jpg

Meals which take a little bit of protein, some vegetable and some pasta, combined in a tasteful way.   Simple recipes which make good use of simple ingredients in a delicious way.

 photo SAM_2977_zps8f5291b6.jpg

I have no idea why this is called Irish Supper.  I am not even sure if this is actually Irish!  Certainly there would be cabbages and sausages in Ireland, but the pasta noodles?   Well, I am not too sure about that!!

 photo SAM_2980_zpsdfd3744e.jpg

What I know for sure it that it makes a little bit of meat go a very long way and that it is delicious.  Two things that are positives!  I do hope you will try it and that you will enjoy it as much as I do!

 photo SAM_2981_zps1ff54a25.jpg

You want to use a good quality sausage with this.  Not those cheap and nasty ones that are all filler and fat.  You get what you pay for.  Paying a tiny bit more and using a good quality sausage makes sense as you won't be pouring half of it away and they'll also taste a lot better!  Choose a nicely flavoured one!  I am partial to a peppery Cumberland myself!

 photo IrishSupper_zps7e53e8fc.jpg


*Irish Supper*
Serves 4 to 6
I don't know if this is Irish, I only know it's economical, easy and very delicious!


1 pound of wide egg type of noodles, uncooked (I used some German ones I found in Aldi,
but you could use any type, so long as they are wide and flat)
1 pound good quality, well flavoured sausage meat, crumbled
1 small head of white cabbage, cored and finely shredded with a sharp knife
salt and black pepper to taste
1/2 tsp dried thyme leaves
1 tsp sugar
a knob of butter
finely grated cheese to serve

Crumble your sausage into a large skillet.  Cook over medium high heat until it is browned.  I use a potato masher to mash it up as it is browning.  This helps to break it up all crumbly like.  Once the sausage is browned add the cabbage.  Sprinkle with salt, pepper and thyme leaves.   Cook, stirring until it begins to wilt.  Turn the heat to low and cover with a lid.  Cook for about 5 minutes.

While the cabbage is cooking, cook your noodles according to the package directions in a pot of lightly salted water.   At the end of five minutes remove the lid to skillet and turn up the heat and cook stirring, until the cabbage begins to brown a little.  Taste and adjust seasoning as needed.

Turn out the heat and drain the noodles well.  Toss the drained noodles into the skillet along with a knob of butter.   Toss to combine.  Serve immediately without or without cheese as desired to your grateful family which will be sitting at the table drooling in anticipation.

 photo e347a0d30c72511616bf6d34809ddcd9_zpsea3f112f.jpg 

Do you think they might approve??  I like to think they would . . . ☺ to be sure, to be sure . . .

Almond Crescents


 photo SAM_2955_zpsd6bf620c.jpg

A good friend of mine had a knee replacement done about a week and a half ago.  We were going to visit her today to see how she is doing and help break the monotony of being largely immobile and so I decided I wanted to bring her some little treat. 

  photo SAM_2958_zpsa7b29292.jpg

At first I was going to bake her some muffins and then I thought . . . maybe muffins would be too much . . . or they would get all squished in the car, or not be at their best by the time we got there.  I love muffins best when they are fresh out of the oven.

 photo SAM_2962_zps52805eab.jpg

That's when I decided to bake her some cookies.  Not kid cookies.  Grown up cookies.   Cookies meant for dunking.   Out of the ordinary cookies.  Not a chocolate chip in sight.  (Although I am a big fan of those myself!)

  photo SAM_2968_zpsd9c7f219.jpg

I decided to make these lovely almond crescents.  They're buttery and crisp  and stogged full of almonds. . . with a crunchy sugar coating of granulated sugar, which bakes on whilst they are in the oven . . . but that is not all . . . no . . . that is not all.

 photo SAM_2969_zpsf90c9553.jpg

They are deliciously rolled in vanilla flavoured icing sugar when they come out of the oven and are still hot, so that the sugar kinds of melts into them.   Another layer of scrum.  Then, there is a final dusting of plain icing sugar that makes them all pretty and nice.   Let's just say they were very much welcomed!

  photo SAM_2961_zps78cf6c5b.jpg  

*Almond Crescents*
Makes about 2 dozen


Buttery and crisp, with a crisp granulated sugar coating and almost shortbread-like texture.  Nutty and sweet.  

65g of ground almonds (1/2 cup almond meal)
65g of sifted icing sugar (1/2 cup)
115g of unsalted butter, room temperature (1/2 cup)
1 1/2 tsp pure vanilla extract
1 tsp pure almond extract
pinch salt
140g plain flour (1 cup)
95g granulated sugar
vanilla icing sugar
plain icing sugar to dust  

 photo SAM_2965_zpse27ca5fa.jpg


Cream the butter with a wooden spoon until light and creamy.   Mix the ground almonds and icing sugar together and stir this into the creamed butter until well combined.   Beat in the extracts and salt until well combined.   Add the flour and mix it in thoroughly and the dough begins to clump together.  

Preheat the oven to 180*C/350*F/ gas mark 4.  Line a couple of baking sheets with some baking parchment.     

Put the granulated sugar into a bowl.   Scoop out cookie dough and shape into 1 inch balls.   Roll the balls into even cylinders and then shape into crescents, tapered at the ends.   Roll them in the granulated sugar and then place them on the prepared baking sheets, leaving 2 inches between each.  

Bake for  8 to 10 minutes, flipping the baking sheets halfway through the baking time.   The edges should be light brown when done.   Remove from the oven.  Have a small bowl of the vanilla icing sugar read and roll the still warm cookies in this.  Place them on a wire rack to cool completely.   Dust lightly with plain icing sugar.  Store in an airtight container. 

The recipe only makes about 2 dozen . . . but taste one and you will realize how very dangerous it would be to have more than that around.  Absolute scrum!

//