The Deliciousness of the Past and Looking Forward . . .
I thought it would be fun to begin this first day of the year with my Top Ten All Time Most Popular Posts. Some of them are not surprisingly so . . . but there are a few surprises in the bunch, which surprised even me!
So without further adieu on with the show!
Fudge Brownie Pie
Not only is this the most viewed and most popular recipe on the blog, but it was also amongst the top Pins in the UK for this past year. High praise indeed when it comes to popularity, but I can hold my hand up and say that this is a fabulous bake and a winner on all counts. It's delicious full stop!
Toad in the Hole
You can't get more British than Toad in the Hole. No surprise here that it is so popular. Brilliantly browned and meaty bangers nestled in a bed of yorkshire pudding batter and baked until the batter is light and crisp. Slathered with onion gravy and served up with some veg and mash, this is a winner/winner of a dinner!
Spicy Plum Chutney.
I don't think I had ever eaten chutney prior to moving over to the UK. It was, however, one of the first things I learned to make in culinary school and something which I have come to love. This spiced plum version is a real favourite of ours and not surprisingly a favourite with all of you as well!
Sticky Toffee Cake
Not sticky toffee pudding, but a deliciously moist cake studded with caramel chunks of dates and then topped with a beautiful sweet brown sugar caramel glaze. No surprise here either. Sticky Toffee has to be one of the most popular flavours in the UK and much sought after, but this is a cake, not the pudding . . .
Baked Corned Beef Hash
Ok, I will admit, this one surprised me. It's corned beef hash, and it's baked. Nothing complicated here, but simple ingredients and flavours, simply prepared. It is delicious, economical and easy, but then again . . . perhaps those things are all a part of it's appeal and popularity!
Beans on Toast
Oh my but this did make me smile. It's such a simple dish, but also very popular with the readers. It's a simple dish. Comfort food. Simple ingredients with a little twist of a cheese and onion on toast base. Simply delicious, and you think so too!
Potato, Cauliflower and Cheddar Bake
What can I say. D-E-L-I-C-I-O-U-S
There, I said it. A fabulous mix of potates, cauliflower and creamy sharp cheddar cheese, with just enough of a crunch on top to make it look and taste beautiful. It is one of our all time favourites too. Scrummo!
Slow Roasted Pork Belly
A delicious treatment of an economical cut of meat, done up wonderfully with a crisp crackling on the exterior and succulent moist pork inside. Proof positive that tasty doesn't have to be expensive. Grandmother did know best! (I always knew that.)
Almond Macaroons
Who does NOT love a macaroon? Not a macaron, but a macaroon, it's simple and plain country cousin. There is no faffing about or pretense here. This is just good cooking. Deliciously chewy and yet crisp.
Nigel's Sweet and Hot Plum Chutney
No surprise here either. You can't NOT love one of Nigel Slater's recipes. I simply adore them for their simplicity and delicious flavours. He cooks exactly like I want to eat and apparently how you like to eat too! We all love Nigel!
Do you want to know what my favourite recipe of the year was??? It was really hard for me to choose because I cooked so much deliciousness. Hard as the choice was though I have finally settled on these delicious Sour Cherry Amaretti, which I cooked way back in January of last year!
They were absolutely wonderful. I just adored them and every time I think of them I want to bake them all over again! You will too.
*Sour Cherry Amaretti*
Makes about 2 dozen
Printable Recipe
Delicious little almond flavoured biscuits, sweet and chewy and flecked with bits of dried sour cherries. Do be careful with the almond flavouring. Too much will be too much. You only want a couple drops.
120g golden caster sugar (10 TBS)
180g ground almonds (2 cups +2 TBS)
the finely grated zest of one unwaxed lemon
2 to 3 drops of pure almond extract
pinch of fine sea salt
60g dried sour cherries, roughly chopped (6 1/2 TBS)
2 large free range egg whites, at room temperature
2 tsp liquid honey
a bowl of sifted icing sugar to roll them in
Preheat the oven to 170*C/ 325*F/ gas mark 3. Line a baking sheet with baking paper. Set aside.
Measure the ground almonds, sugar, lemon zest and almond extract into a bowl. Rub together to help to distribute the ingredients evenly and release the oils and flavour from the lemon zest. Stir in the cherries.
Whip the egg white along with the honey until soft peaks form. Fold them into the almond mixture with a fork. You should have a soft malleable mixture.
Pinch off heaped tablespoon sized lumps of the dough. Roll into an egg shape between your hands then drop into the bowl of icing sugar. Toss gently to generously coat. Place onto the prepared baking sheet, gently pressing down on each side to make sort of a deconstructed triangular shape.
Bake for 12 to 15 minutes, turning the pan around halfway through the baking time. When done they should have taken on some colour, but still remain relatively pale and chewy in the centre. Allow to cool completely before eating. Store in an airtight container.
If you can't get the sour cherries you can use chopped dried cranberries, dried apricots or even dried blueberries. All are very good!
Happy New Year!
Here's to another twelve months of delicious adventures shared together!
A few Nibbles for New Years
We did a One Night in Bethlehem activity at our chapel prior to Christmas. We tried to serve all biblical or middle eastern foods . . . finger foods, foods that would make great nibbles for the New Year's Eve Buffet table.
I made this lovely feta dip, which was really delicious and tangy and so simple to make. It is basically just feta cheese, olive oil, thyme and lemon zest and juice blitzed until smooth in the food processor or blender. Very simple really.
It was absolutely wonderful! It was nice served with vegetables for dipping and crackers for spreading. You want something crisp to go with the smooth richeness of this dip. It went down a real treat.
*Creamy Feta Dip*
Makes about 2 cups1 fat clove of garlic, peeled
the finely grated zest of two unwaxed lemonsTo finish:
a drizzle of olive oil
a few thyme leaves
a drizzle of olive oil
a few thyme leaves
I also made these lovely little Lamb Kofta Meatballs. Spicy and just wonderful served with some pita breads and Tzatziki for dipping. You could fry them if you wanted to, but I just bake them in the oven because they brown nicely, evenly and as lamb is a rather fatty meat anyways it helps to cut down on some of that extra fat.
*Kofta Meatballs*
Makes about 20
Moist and spicy. Serve with some Tzatziki sauce for dipping. (Your own or purchased) Makes about 20
Note: These are also nice served hot and tucked into warm Pita Breads with some lettuce and sauce.
Happy New Year! Have fun and stay safe!
Healthy Snacking for the new year
I was recently sent a packet of these delicious Mrs Crimble's Mature Cheese & Onion oven baked Potato Bites to taste. I can't show you what they look like as they were largely crumbs by the time they got pushed through my post box, but I can tell you what they taste like! Delicious.Crisp and crunchy, satisfyingly so with a lovely mild cheese and onion flavour.
I don't know about you, but after all the feasting of the past few weeks I am going to be trying to eat a bit healthier in the next few weeks, with lots of fruit and veg and when it comes to wanting a bit of an indulgence, a now and again snack like these Mrs Crimble's Mature Cheese & Onion Potato Bites.
At only 90 calories a bag they help to keep the calories down and they are definitely tasty . Oven baked (not fried) and gluten free they make a delicious alternative to all those high fat bags of crisps.
At present they are available at the Co-op at £1.79 for a multi pack of 4.
Cheesy Bacon, Potato and Cabbage Gratin
I just adore all the fresh local produce that we find in the shops at this time of year . . . lovely cabbages, red, white and savoy . . . beautiful carrots, and onions . . . potatoes, beetroot, parsnips, beans, cauliflower, leeks, etc. There is no end to it all . . . that makes me a very happy camper. I love to eat seasonally and everything tastes so very delicious when it's fresh and local.
I love to showcase these fabulous fresh ingredients in any way that I can and incorporate them into our meals on a regular basis. I have to confess that you cannot get a much nicer bake . . . than a vegetable gratin . . .
This one that I am sharing with you today is especially nice . . . using not only potatoes and onions . . . but cabbage and bacon as well . . . and not one . . . but TWO lovely cheeses.
First a nice freshly grated chunk of wonderful Parmesan cheese. True Parmigiano-Reggiano has a beautiful complex flavor that goes very nicely in dishes like this. It brings to the table a slightly nutty/fruity flavor along with a strong savory undertone . . . a wonderful addition.
Then there is an abundant amount of taleggio cheese, which is a washed rind and smear ripened Italian cheese with a strong aroma, but fruity mild taste. It's beautiful melting qualities are perfectly showcased in this lovely dish.
Let's not forget the back bacon . . . which lends a light smokey flavor, which is quite delightful when enjoyed along side of the cheeses and those tender vegetables.
Mind you . . . there's not much that can't be beautifully enhanced with the addition of bacon and cheese don't you think??? Nom Nom! A simple supper with complex and robust flavors. I like that very much.
*Cheesy Bacon, Potato & Cabbage Gratin*
Serves 6
Printable Recipe
Wholesome, hearty and delicious autumn fare. A novel way of using autumn produce that will please the whole family.
4 medium potatoes, peeled and cut into 1 inch chunks
3 TBS extra virgin olive oil
185g back bacon, diced (6.5 ounces)
1 large onion, peeled and thinly sliced
2 cloves of garlic, peeled and minced
1 tsp fresh thyme leaves
1/4 tsp chili flakes (or to taste)
675g of savoy cabbage, trimmed, quartered and cut into a chunky dice (1 1/2 pounds)
55g freshly grated Parmesan cheese (2 ounces)
fine sea salt and freshly ground black pepper
butter for buttering the pan
225g of taleggio cheese, diced (8 ounces)
Bring a large pot of lightly salted water to the boil. Add the potato and bring back to the boil. Cover and cook for exactly 5 minutes, or until just barely tender. Drain well and then place in a large bowl.
Heat the oil in a large skillet. Add the bacon and fry until the bacon begins to color. Lower the heat and add the onions, garlic, thyme and chili flakes. Cook gently, stirring occasionally, until the onion has softened.
Wash the cabbage pieces. Tip a third of it into the pan while it is still wet. Cook, stirring and adding more cabbage as it wilts in the pan, until you have added all of the cabbage and adding a bit of water as necessary to help keep the cabbage from sticking to the pan. Once the cabbage is completely wilted, remove the pan from the heat and dump this mixture into the bowl with the potatoes. Toss gently together. Season to taste with salt and pepper. Tip in half of the Parmesan cheese.
Preheat the oven to 200*C/400*F/ gas mark 6. Butter a 9 inch square glass baking dish, at least 2 inches deep.
Layer half of the cabbage and potato mixture into the pan. Dot with half of the taleggio cheese. Cover with the remaining cabbage and potato mixture. Sprinkle with the remaining Parmesan cheese and dot with the remaining taleggio.
Bake for 30 to 40 minutes, until the vegetables are piping hot and the cheese is bubbling and flecked golden brown.
A little pickle on the side and some buttered bread and we were in heaven . . .
Cream Palmiers
One thing that I love about food blogging is that it's not about me. It's not even about you . . . it's about the recipes and the food!
It's about being able to cook and taste some of the best and most indulgent foods ever . . . and exploring the culinary delights my adopted country has to offer me.
It's about stretching my skills . . . both in the kitchen and . . . behind the camera . . . and about making food that not only tastes delicious, but food that looks good.
It's about waking up every morning and making YOU believe that what I am presenting to you on this page is the absolute best thing ever . . .
and about making you want to go into your own kitchen and cook it for yourselves, because you have just got to taste it for real, and because I have inspired you to do it, and given you the confidence to believe that you can!
Your comments are like me winning the "X Factor of food" every day of my life, and I thank you for that. Here's to more deliciousness in 2014. Let's begin as we mean to go on.
Cream Palmiers . . . tasty little bites of fluffy crisp buttery pastry, filled with a soft cloud of sweetened whipped cream and sticky sweet strawberry jam. Kind of like a de-constructed jam tart . . . with puff pastry . . . and CREAM. A delicious teatime treat.
The only down side is they all have to be eaten on the day they are filled . . . so NOT a problem!
*Cream Palmiers*
Makes 8
Printable Recipe
Absolutely delightful on the tea tray!
225g (1/2 pound) of all butter puff pastry
1 1/2 ounces granulated sugar (a scant 1/4 cup)
1 TBS icing sugar, sifted
400ml of double cream (1 3/4 cups)
a few drops of vanilla
2 TBS strawberry jam
Preheat the oven to 220*C/425*F/ gas mark 7. Slightly dampen a baking tray. Set aside.
Dust the work surface with half of the sugar. Roll the pastry out on the sugared surface to a rectangle 10 by 12 inches in size. Sprinkle evenly with the remaining half of the sugar. Gently press the sugar in with a rolling pin. Starting at the short sides, roll the pastry towards the middle from both edges into the centre until they meet. Press together gently. Cut across the rolls into 16 slices. Place onto the baking tray. Press down to flatten slightly.
Bake in the preheated oven for 15 to 18 minutes until crisp and golden, turning them over halfway through the baking time so that they caramelize equally on both sides. Transfer to a wire rack to cool.
Whip the cream along with the icing sugar and vanilla until soft peaks form. Sandwich together pairs of the palmiers with some of the whipped cream and some of the jam. Serve immediately.
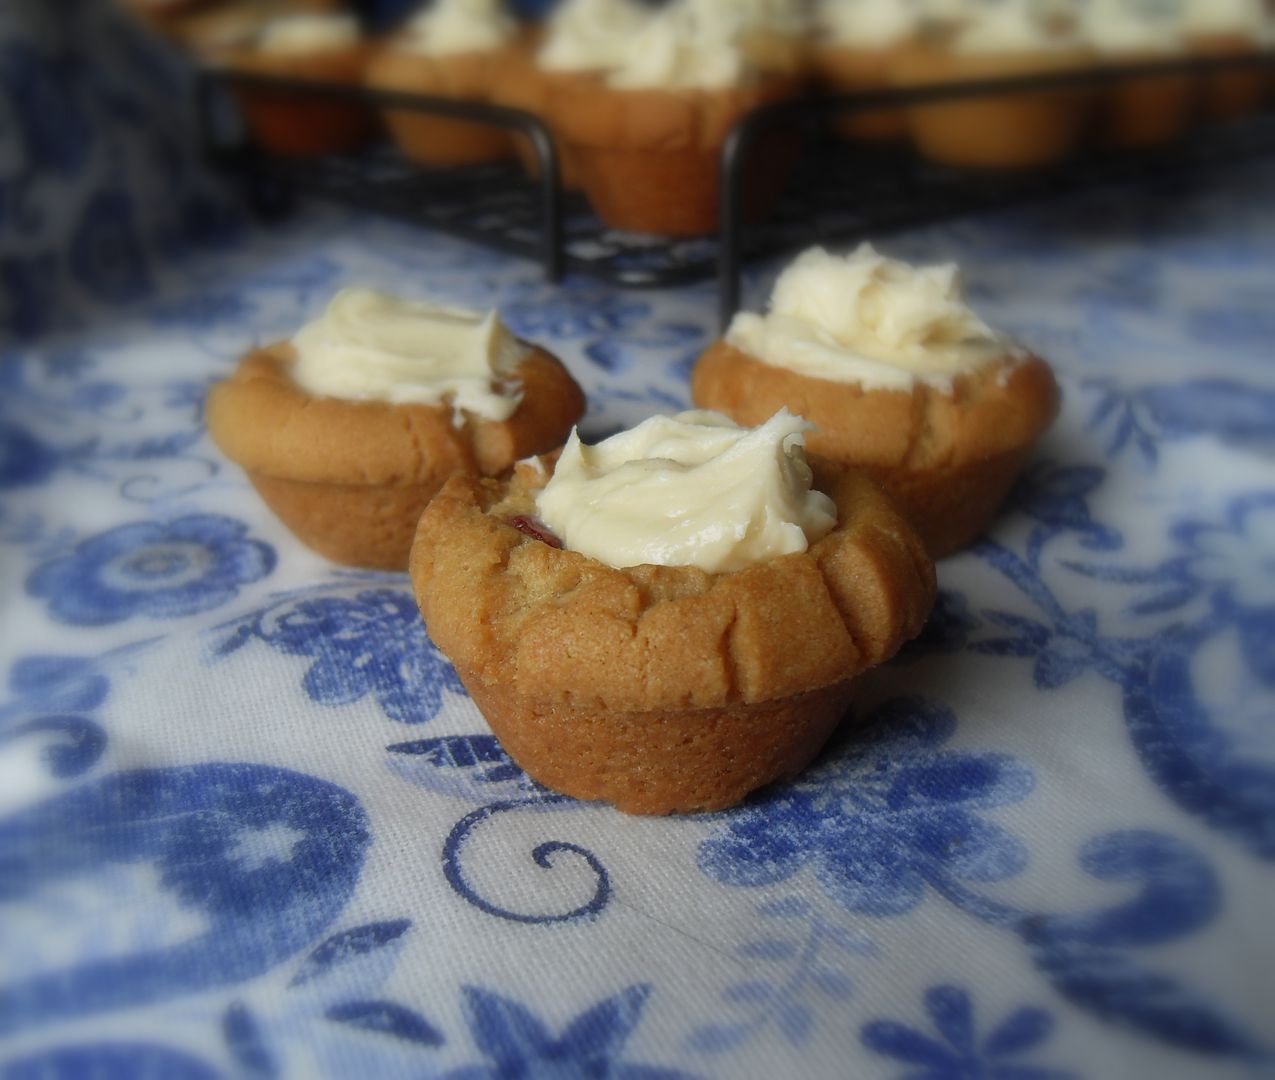
Peanut Butter and Jam Cookie Cups
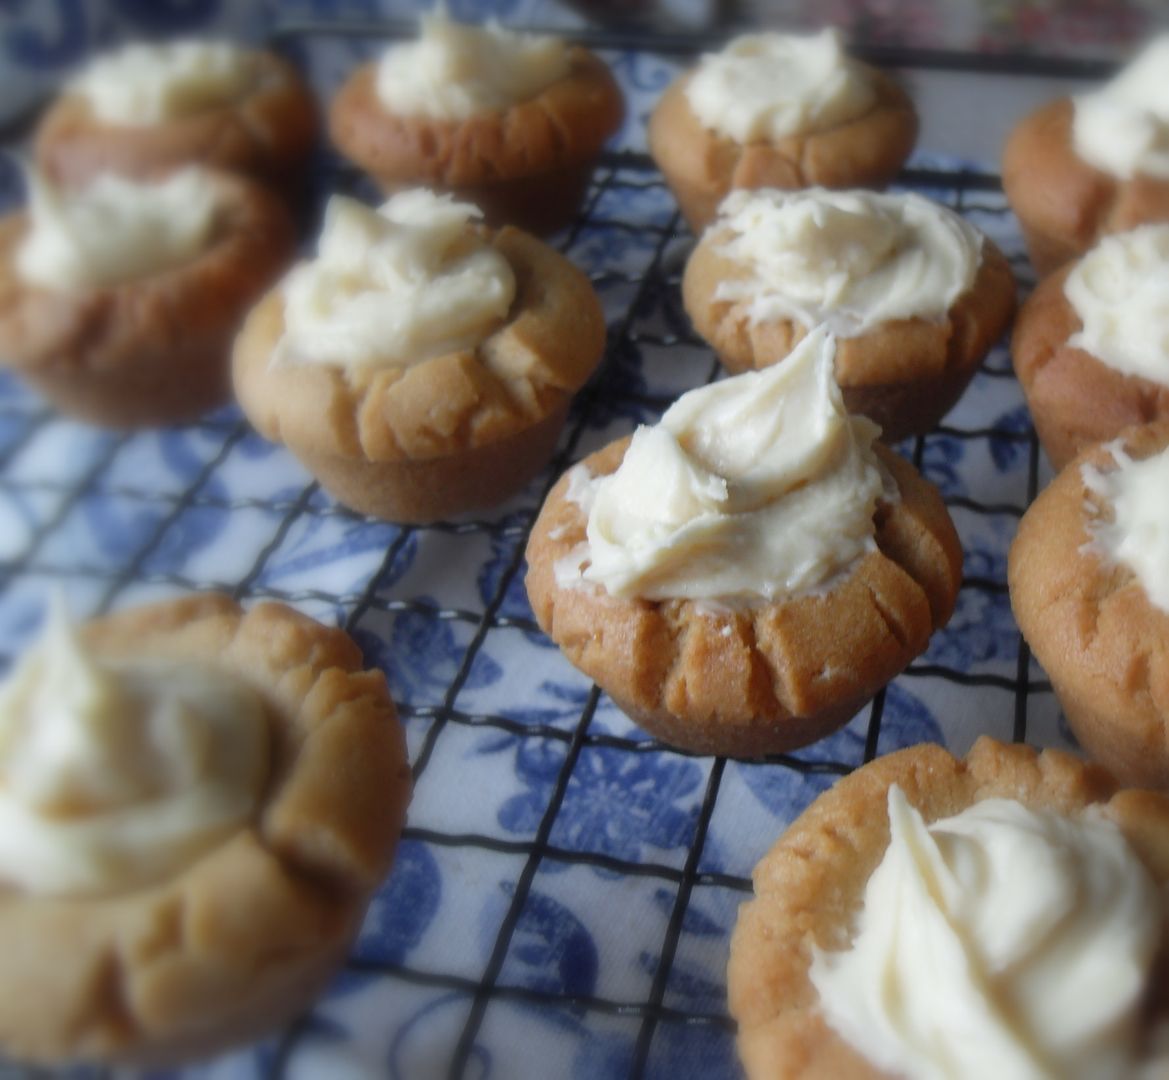
My very British Husband is quite fond of telling me that eating peanut butter and jam together is completely insane. That didn't stop him from scarfing down three of these as soon as I had them finished though! (Me thinks he is a bit of a porkie pie teller and that he secretly LOVES the combination as much as I do!)
Could it be that I have finally indoctrinated him to my wild and wooly North American ways???? Could it be that his veins are beginning to run a tiny bit with peanut butter and jam??? I like to think so at any rate! This is a combination I love soooo much! It's that sweet and salty thing!
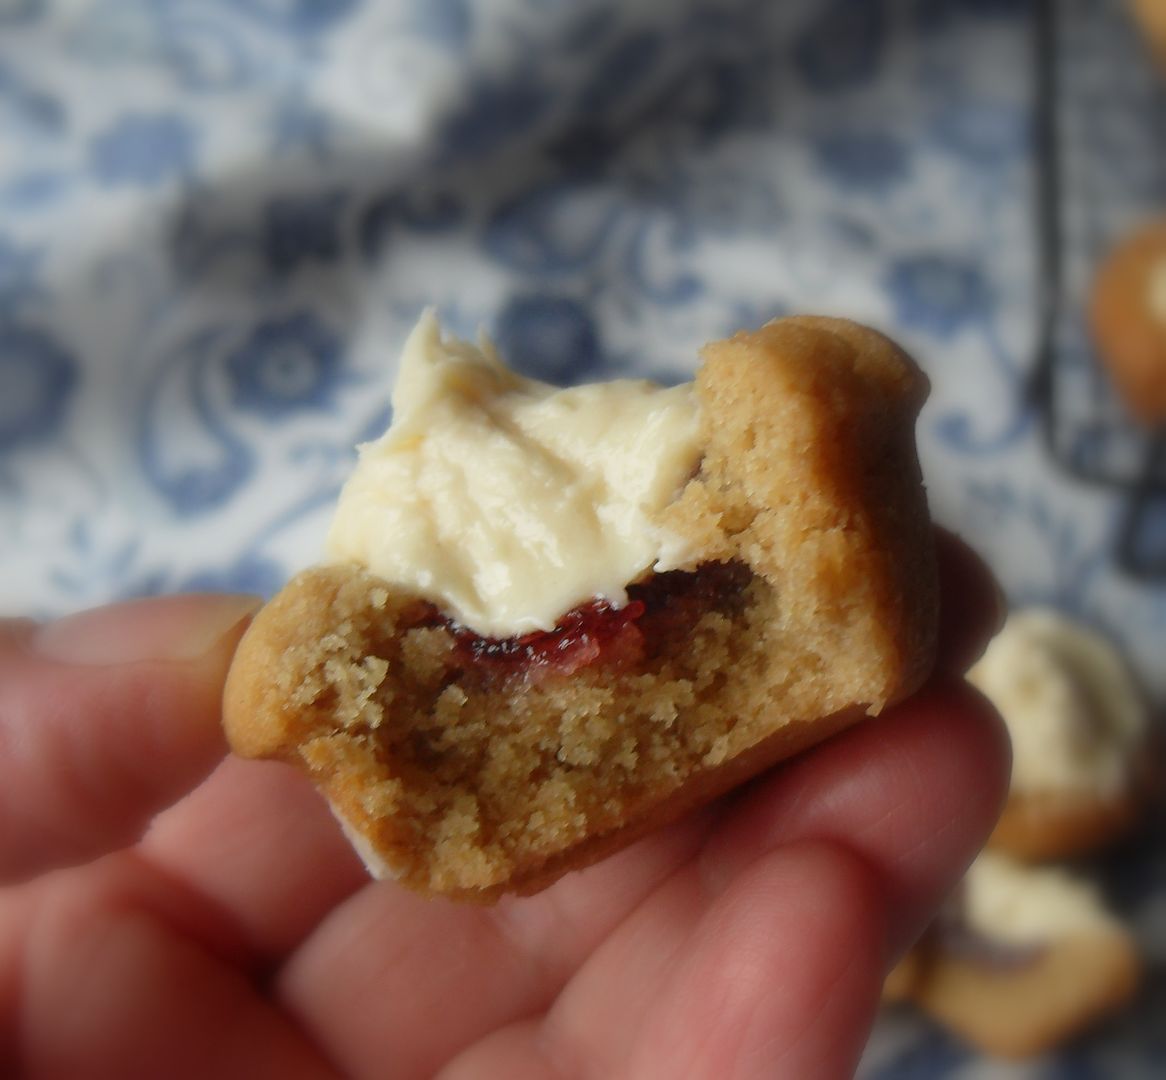
Today I decided to indulge it by making little peanut butter cookie cups. I was going to make them snickers cups . . . but then I got sidelined by the Thames Jubilee Pageant and so I just filled them with jam before baking and then topped them with a quick buttercream icing. I wanted to sit and watch all the fun!
(Oh my but it was fabulous! I've never seen anything like it. Everyone was turned out beautifully. I thought Kate was just gorgeous, as always, and the Queen looked positively radiant!)
This is the type of thing I would positively make for Her Royal Majesty, did she ever chance to drop in for tea. I would want to bake her something to with her cuppa that was ludicrously North American and what can be any more North American than Peanut Butter and Jam!! (I don't think she'd enjoy porqupine . . . not really.)
Crisp peanut butter cookie cups . . . baked with a sweet dab of jam in the middle . . . then topped with a peanut butter flavoured butter cream frosting. Oh so scrummishly moreishly decadently good!! Bet YOU couldn't eat just one either!
*Peanut Butter and Jam Cookie Cups*
Makes about 36
Printable Recipe
Tasty little peanut butter cookie cups, filled with jam and baked until crispy and then topped with a peanutbutter flavoured buttercream icing when cool. M-O-R-E-I-S-H!!
For the cookie cups:
280g of flour (2 cups)
1/2 tsp bicarbonate of soda
1/4 tsp salt
172g of unsalted butter at room temperature (3/4 cup)
135g of creamy peanut butter (3/4 cup)
96g of caster sugar (1/2 cup)
100g of soft light brown sugar (1/2 cup packed)
1 large free range eggs
1 tsp vanilla
seedless raspberry jam
For the frosting:
6 TBS unsalted butter at room temperature
100g of icing sugar (3/4 cup) sifted
135g of creamy peanut butter (3/4 cup)
3 TBS heavy cream
Preheat the oven to 180*C/350*F/ gas mark 4. Have ready several mini juffin tins. Spray with some nonstick cooking spray. Set aside.
Cream together the butter and peanut butter until thorougly combined. Beat in the egg and vanilla. Whisk together the flour, salt and bicarbonate of soda. Stir this in to make a soft dough. Shape the dough into 1 1/2 inch balls. Place one in each muffin cup. Press in with the bottom of a rolling pin, or a pastry damper to make a shell. Fill the centres with about 1/2 tsp of jam. Bake for 10 to 12 minutes. They should be lightly golden brown around the edges. Remove from the oven and allow to cool for about 5 minutes, then remove and set on a wire rack to finish cooling completely.
To make the frosting, combine all of the ingredients in a large bowl and beat with an electric whisk until light and fluffy. Spoon or pipe a little dab of this frosting into the centre of each cookie cup to cover the jam. Allow to set completely.
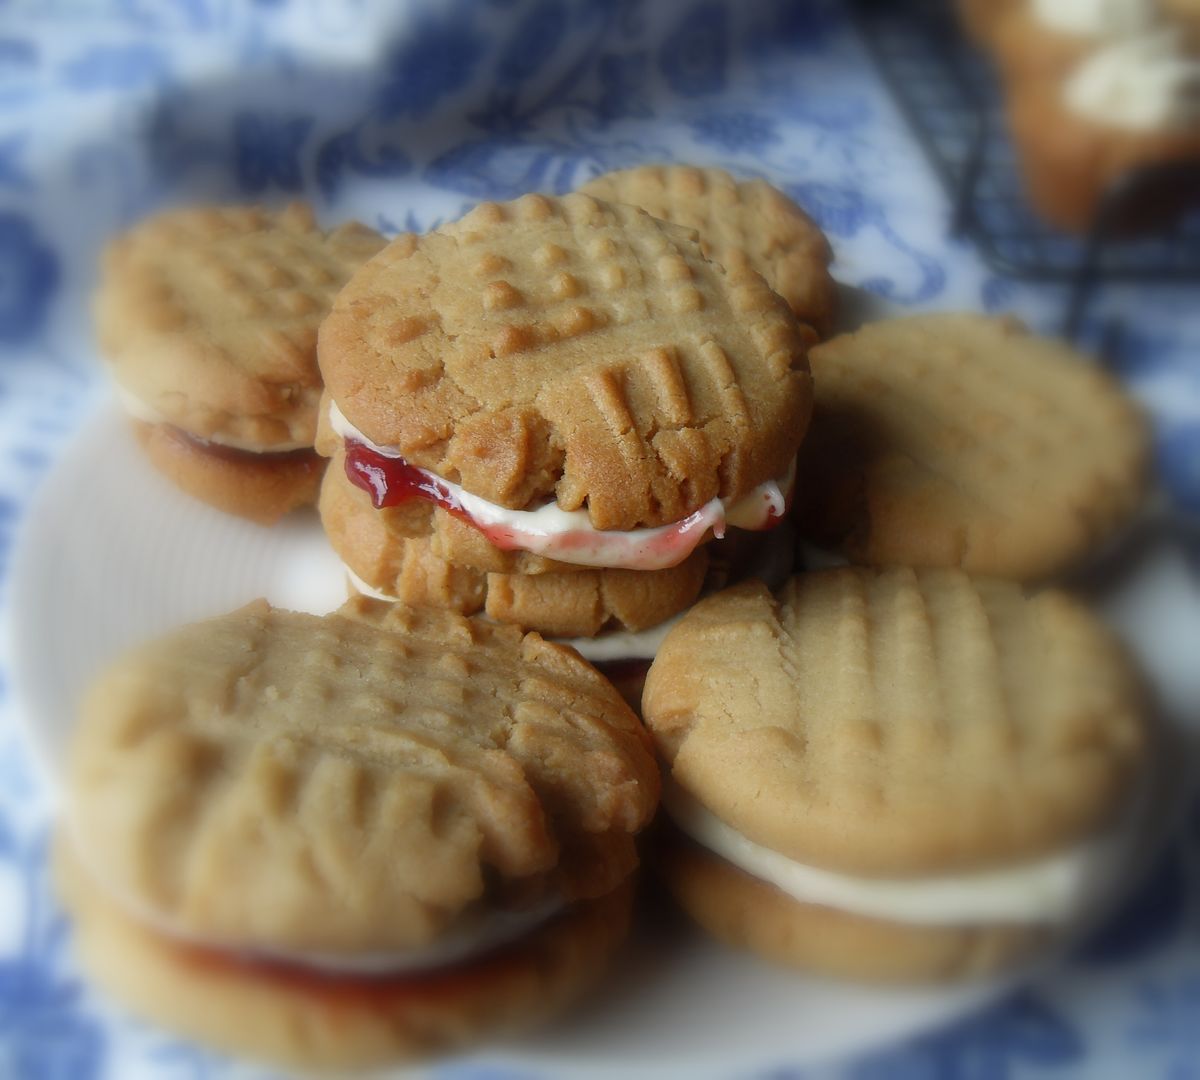
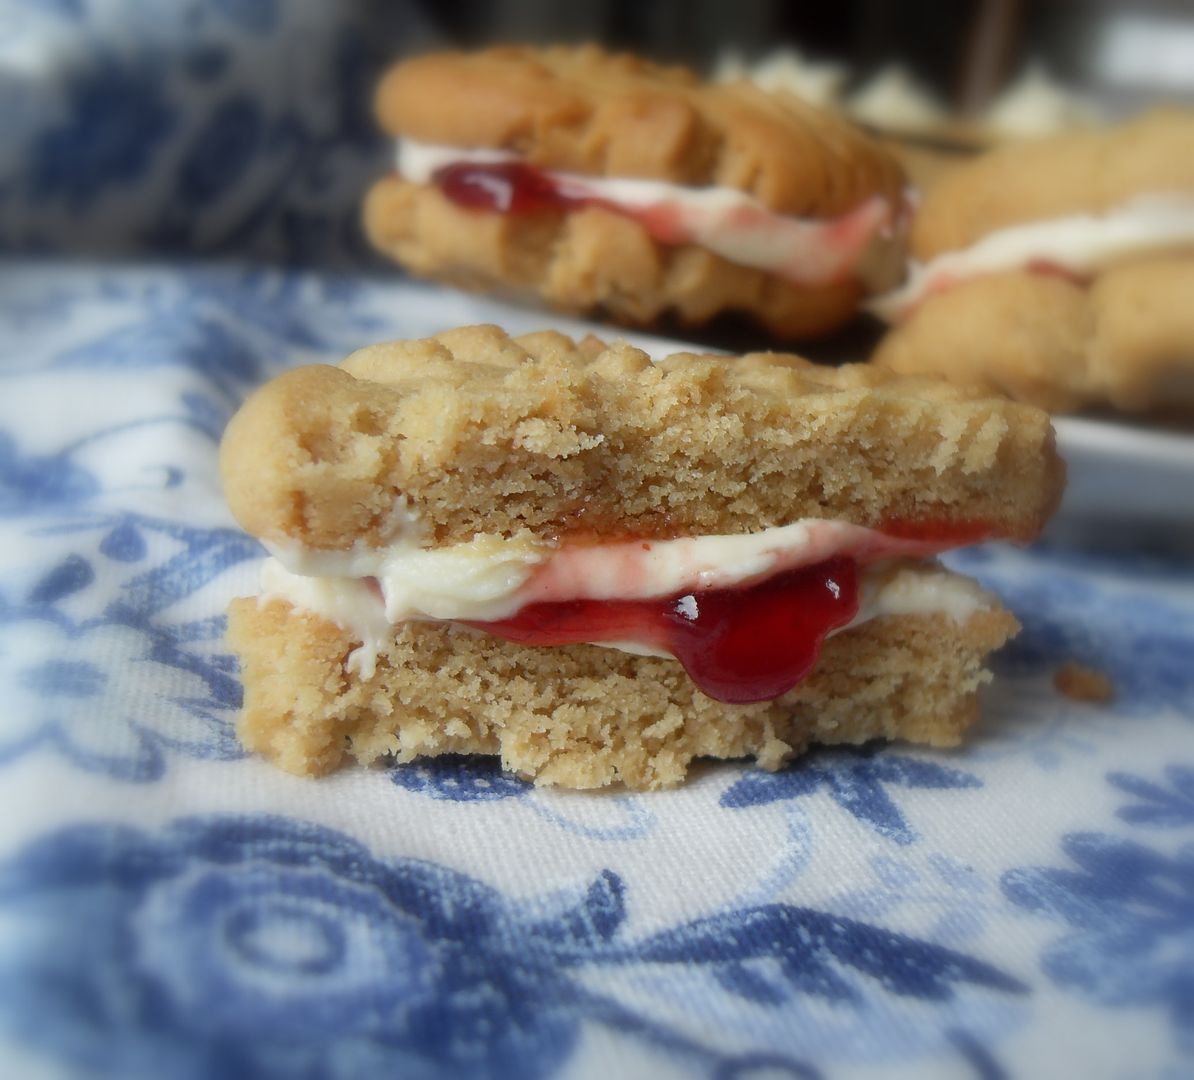
Alternately the cookie dough can be rolled into walnut sized balls and pressed flat with a fork on a lightly buttered baking tray. You can then bake them for about 10 to 12 minutes. Remove to a wire rack to cool completely. Put together with a layer of jam and a layer of the peanut butter flavoured buttercream!
Store in an airtight container in the refrigerator. If you can eat just one, you're a better woman than I am!!
In any case if you didn't want to go to the trouble of making these as cookie cups, you could just bake them as regular peanut butter cookies and then sandwich them together with some of the frosting and some jam!
Parsnip Patties and Celebrations Brownies
Parsnips were not a vegetable we had very often if at all when I was growing up. My mother did not like them at all. In fact she tells a story of her father trying to tempt her to eat just a tiny piece of one in exchange for a piece of candy (when she was a child) and she hated them so much that she couldn't even be tempted with something that was only a very rare treat.
I remember her cooking them once when I was in my teen years. She pared and sliced them into coins and then fried them in butter until they were golden brown on both sides. Oh my but there were lovely. She had been wanting to see if her tastes had changed. Alas . . . they hadn't and so that was the only time we ever had the opportunity to taste them.
As an adult I have cooked them frequently for I love them. They are delicious in stews and soups . . . mashed with butter and cream, roasted, glazed . . . any way you cook or cut them, I find them most delicious. They are well one of my favourite vegetables.
With the holidays I had quite a few of them in the vegetable bin . . . parsnips love nothing more than to be roasted and glazed and served with a roast turkey or beef . . . or ham and pork. I always get in lots because they are my favourite side dish of the holidays.
I did get in rather a lot this year though . . . but no worries for today I had enough left to make these delicious Parsnip Patties. Oh my but they are some good.
Crispy and buttery on the outsides . . . creamy and mildly spiced with a delicate flavour and sweetness on the insides . . . such a pleasure to eat.
I like to make a Cranberry Mustard to eat with them. I just whisk together equal parts of a wild cranberry sauce and Dijon mustard. It is the perfect accompaniment.
Of course you can make them a lot smaller for appetizer sized servings, about the size of a one pound coin or silver dollar will do. You'd get quite a few of these and of course would need extra oil for frying.
They are easy to make ahead of time and then just reheat in the oven when you want them. If you like parsnips, you're going to love these!
*Parsnip Patties*
Serves 4 to 6
Printable Recipe
Creamy and sweet on the insides, crunchy on the outsides. Delicious! I like to serve them with a Dijon Cranberry Mustard which I make by whisking together equal parts of a whole berry cranberry sauce and Dijon mustard.
8 to 10 parsnips, peeled and sliced into coins
1/2 tsp salt
boiling water
to finish:
1/2 tsp onion salt
1/4 tsp dry mustard
1/2 tsp salt
1/4 tsp freshly ground black pepper
a dash of cayenne pepper
1 medium free range egg, beaten
1 1/2 ounces fine dried bread crumbs (about 1/3 cup)
more dried bread crumbs for rolling
oil and butter for frying
snipped parsley for garnish
Cook the parsnips in the boiling water with the 1/2 tsp of salt until tender. Drain and mash well. Allow to cool. Stir in the first lot of bread crumbs and all of the seasonings, along with the beaten egg. Cover and place in the refrigerator to chill well.
Scoop the well chilled mixture out using a small handful and shape into patties. Coat with the additional bread crumbs.
Heat a few TBS of butter along with an equal amount of oil over medium heat until the butter begins to foam. Add the parsnip patties and cook until golden brown on both sides. Drain and then serve hot along with some cranberry mustard. Delicious! Garnish with chopped parsley if desired.
Here is a little bit of tempting delicious for you today. Celebrations Brownies. A tasty way to use up some of those leftover Christmas chockies!
*Celebration Brownies*
Makes 15
Printable Recipe
Imagine a brownie so rich and gooey that you can’t help gasping with pleasure when you sink your teeth into one . . . now add the hidden surprise of your favourite chocolate candy bar deep inside it’s decadently rich, chocolaty depth . . . Yes, you have died and gone to heaven.
7 ounces butter (13.8 TBS)
3 ½ ounces dark chocolate, broken into pieces (use really good quality, no less than 60% chocolate solids)
12 ounces dark soft brown sugar (1.69 cups)
4 large eggs
1 tsp vanilla extract
8 ounces self raising flour (2 cups)
Pinch of salt
10 ¼ ounce box of Celebration** chocolates, or other chocolates of your choice (Imagine Maltesers dotting the middle or a lovely layer of thin chocolate After Eight mints)
Pre-heat the oven to 180*C/350*F. Brush an 11 X 7 inch tin with melted butter and then life with greaseproof paper. Set aside.
Put the butter and the chocolate in the top of a double boiler over simmering, but not boiling water, making sure the water does not touch the bottom of the top pan. Allow to melt, stirring occasionally. Remove from the heat. Stir in the chocolate, mixing it in well.
Beat the eggs together with the vanilla and the pinch of salt. Stir this into the chocolate mixture, mixing it in well. Sift the flour and stir in until well combined.
Un wrap the chocolates.
Pour half of the chocolate batter into the prepared tin. Lay the chocolates evenly spaced carefully over the top of the batter, making sure that there will be at least one in each portion that is cut. Pour the remaining batter over top, ensuring that all the chocolates are completely covered.
Bake in the heated oven for 15 to 30 minutes until the top is crispy and glazed looking but the insides are still soft. Remove from the oven and to a rack to cool. Allow to cool completely before cutting into bars.
**Celebration chocolates are a mixture we can get over here of small miniature chocolate bars such as Milky Way, Bounty, Mars, Snickers, etc. If you can’t get those use any favourite chocolate of yours. Malted milk balls sprinkled over the layer work quite well, as do thin chocolate mints. Chunks of caramel bar work equally as well. Let your decadent foodie imagination run free!
สมัครสมาชิก:
บทความ (Atom)